
Choose your browser
Tap a guide to open its steps.
ChromeInstall in ChromeFrom the Chrome Web Store · 3 steps
- Open the store listing. Open Tee Sniper in the Chrome Web Store from desktop Chrome.
- Add the extension. Click Add to Chrome, review the requested permissions and confirm Add extension. Pin Tee Sniper using Chrome’s puzzle-piece Extensions menu.
- Open your course. Log in to the course website and refresh its tab. Open Tee Sniper, enter the license key from your email and check your settings before arming. Installing the extension does not include a license.
Already using the ZIP / Load unpacked version? Disarm it first. Keep your key and settings privately and contact support@teesniper.app before switching. The store copy is a separate installation; settings may not transfer and your key may need an installation reset. Do not run both copies on the same course page.
Store-installed updates: Chrome manages extension updates. After an update, refresh your course tab and check the panel settings before arming. Existing unpacked installations keep their separate manual update route below.
Edge / BraveInstall in Edge or BraveManual ZIP install · 8 steps
This is the manual ZIP route. New Chrome installations should use the Chrome Web Store section above.
Download the zip
Open the email we sent you (from support@teesniper.app) and tap Download Tee Sniper — your key is already filled in, choose the Edge / Brave ZIP button and your browser saves teesniper_v3.9.3.0.zip to your Downloads folder. Lost the email? You can also download with your license key.
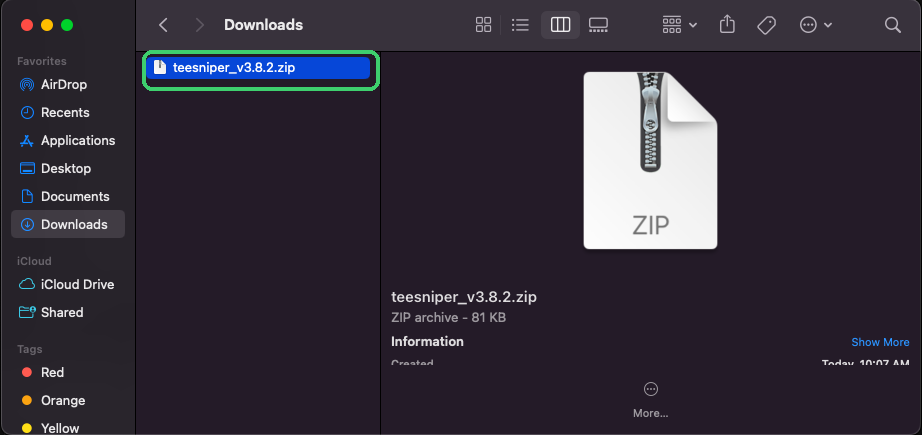
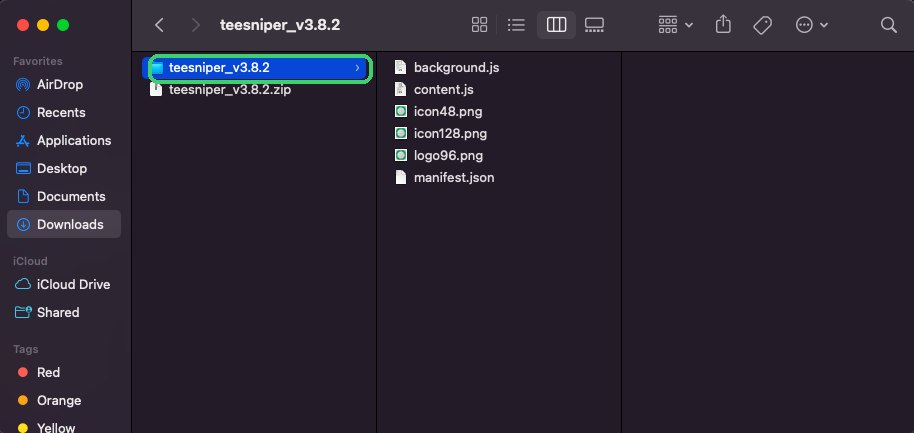
Double-click the zip
One double-click turns the zip into a normal folder with the same name. That folder is the app — remember where it is, Chrome will ask for it in a moment.
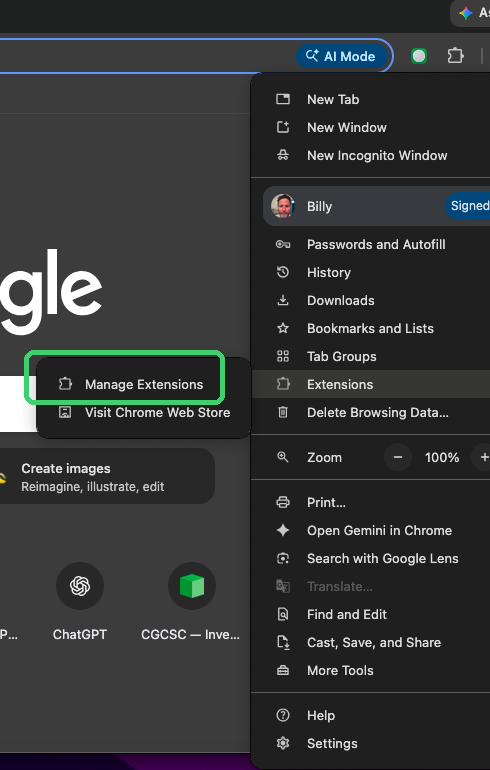
Open the Extensions page
In Chrome, click the ⋮ menu (top right) → Extensions → Manage Extensions.
Turn on Developer mode
Flip the Developer mode switch in the top-right corner. A Load unpacked button appears on the left — that's your install button.

Load the folder
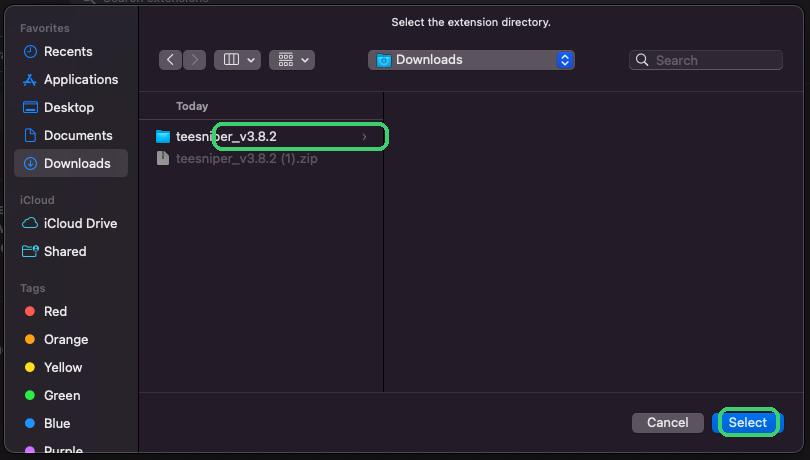
Click Load unpacked, select the unzipped folder from step 2 (the folder itself — not the zip, not the files inside it), then click Select.
Tee Sniper is installed
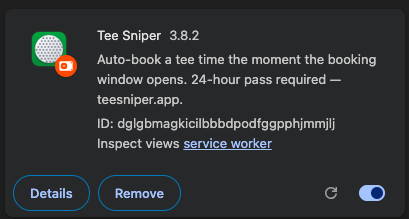
That's it — the Tee Sniper card appears on your Extensions page. The switch on the card should be on (blue).
Pin it to your toolbar
Click Details on the card and turn on Pin to toolbar. The Tee Sniper icon now sits next to your address bar, one click away.


Open your course and arm it
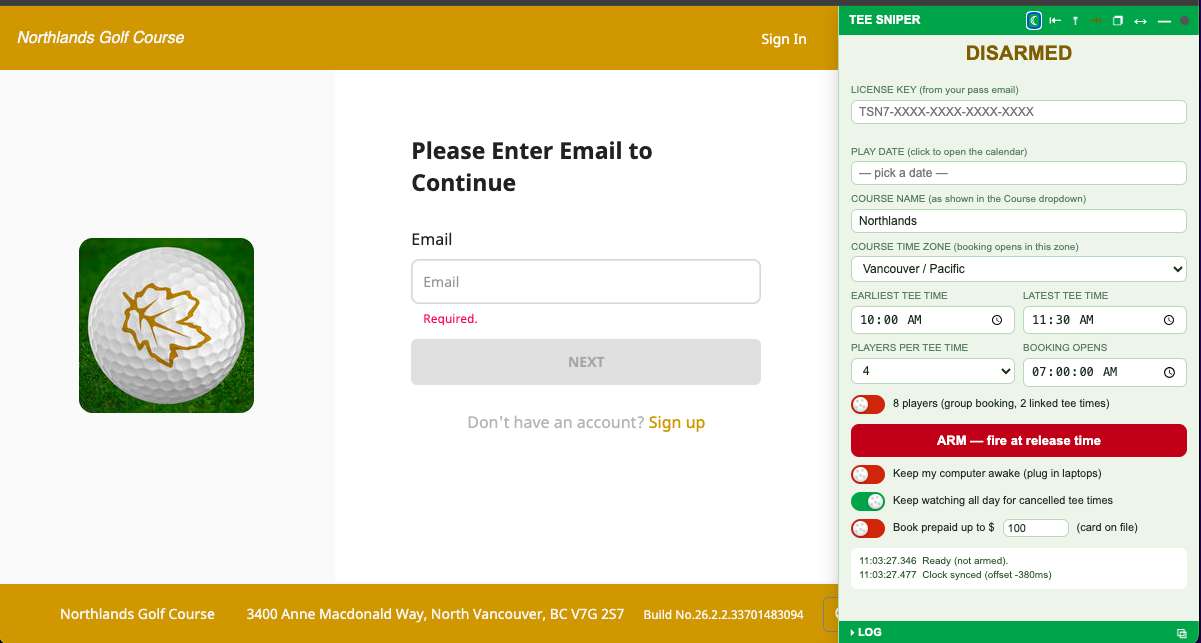
Go to your course's booking page (e.g. Northlands on cps.golf) and click the Tee Sniper icon  in your toolbar. The panel slides out: paste your license key, pick your play date on the calendar, set your time window, and hit the red ARM button. Then leave the tab open and in front (not behind another tab or minimised) — the sniper does the rest at 7:00 AM sharp.
FirefoxInstall in FirefoxMozilla-signed add-on, Firefox 140+ · 3 steps
Firefox support is now available as a Mozilla-signed extension. Install it like any other Firefox add-on — no developer mode or about:debugging needed.
- Download the signed .xpi. From your license download page, choose Download for Firefox. You'll get a .xpi file.
- Open it in Firefox. Double-click the .xpi file or drag it into a Firefox window. Click Add when prompted.
- Arm the sniper. Click the Tee Sniper icon in the toolbar, paste your license key, set your play date and time window, then hit ARM.
Firefox 140+ required. The signed .xpi uses Mozilla's built-in data consent APIs. Your license key and settings persist across browser restarts — this is a permanent install.
⚠️ Troubleshooting: If you see "Could not start license verification" when clicking ARM, try refreshing the course tab first. If the issue persists, contact support@teesniper.app.
Already installedUpdate a manual (ZIP) installKeep your key and settings · 7 steps
These steps apply only to the older ZIP installation. Store-installed Chrome copies use Chrome-managed updates above.
Keep your existing extension. Do not click Remove. Updating in the original folder helps preserve your saved key, settings and installation identity.
- Disarm Tee Sniper first. Do not update while it is watching or waiting to book.
- Download and unzip the new version. Use your update email or download with your license key. On Windows, right-click the ZIP and choose Extract All. On Mac, double-click it.
- Open your original Tee Sniper folder. This is the folder you selected when you first clicked Load unpacked. Keep its name and location.
- Copy the new files into that original folder. Open the newly unzipped folder containing
manifest.json. Copy all its contents into the original folder and choose Replace when asked. Copy the contents, not the outer folder: do not put a new Tee Sniper folder inside the old one. - Reload the extension. Type
chrome://extensionsinto Chrome's address bar and press Enter. Turn on Developer mode at the top right. On the Tee Sniper card, click the circular arrow ↻ Reload. Do not click Remove or Load unpacked again. - Refresh your golf website. Return to the booking tab and click Chrome's circular refresh arrow beside the address bar.
- Check before arming. Confirm the new version is shown on the Extensions page. Open the Tee Sniper panel and check your key, play date, players and time window. The earliest time must be before the latest. Arm only when you are ready.
Already removed it, can't find the original folder, or your key stopped working? Email support@teesniper.app for help. A fresh installation can be treated as a different install, so your existing key may need an installation reset. You do not need to buy another key to request help. Keep license keys out of screenshots.
Your sniper, day or night.
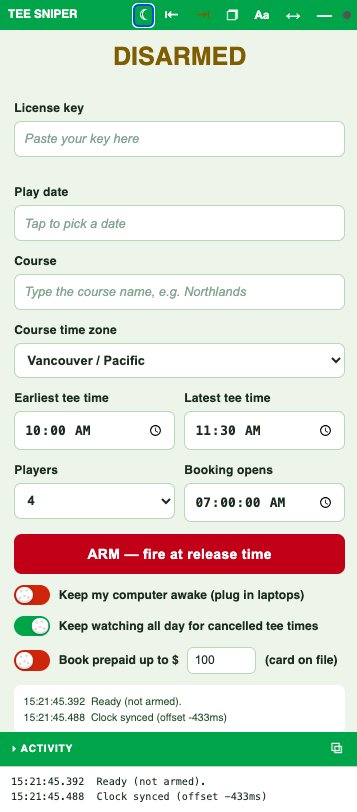
Here's the armed panel waiting on the tee sheet. It ships in two looks — click the ☀ / ☾ button in the panel header to switch. Your choice is remembered.
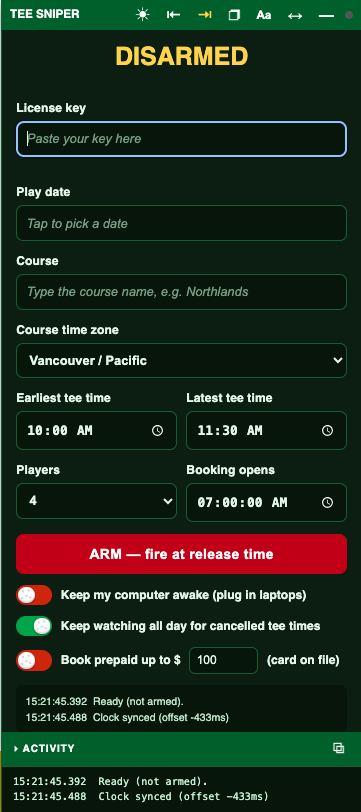
⚠️ Important — always refresh. After installing (or updating) the extension, refresh your course's booking page once (F5 or ⌘R) so Tee Sniper loads into it. Do the same any time you've closed and reopened the browser — no refresh, no panel.
That's the whole thing. The only login you'll ever do is your own CPS golf course account, in your own browser. After that: set your course, date and time window in the panel, click ARM — nothing else. No Tee Sniper account, no extra passwords, nothing to leave running.
📖 Installed? Read the User Guide next →
Updating an existing installation? Follow the update steps above.